In order for your website and e-mail to work perfectly even after your transfer, you must adjust the DNS settings and update the name servers.
Also read: Set up e-mail and mailbox after transferring your domain name
IN THIS ARTICLE
1. Adjust the A record to the IP address of your hosting
The A record of the domain name must refer to the IP address of the server on which the hosting is placed.
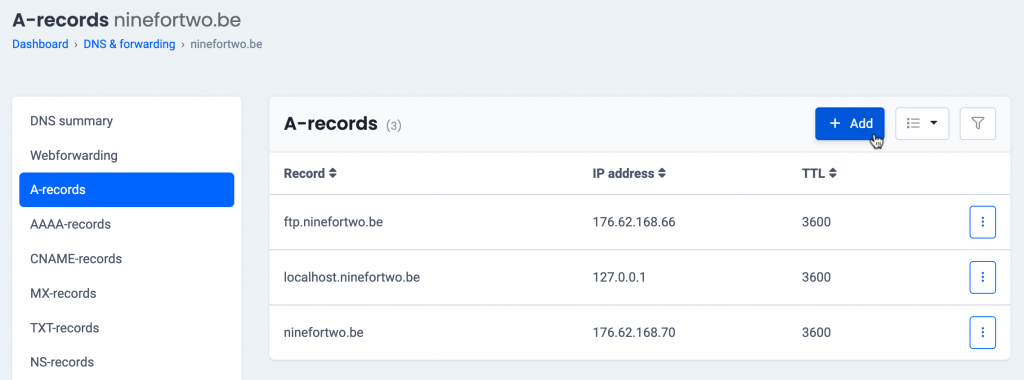
For these 3 hostnames, enter the IP address of your hosting:
- The domain name itself: yourdomainname.be
- The www- subdomain: www.yourdomainname.be. This way, visitors will also end up on your website if they put www in front of your domain name.
- The ftp subdomain: ftp.yourdomainname.be. So that you can use this as a server name in an ftp program.
You can find this in the control panel via My products > DNS & Forwarding management > Your domain name > A-records (see image).

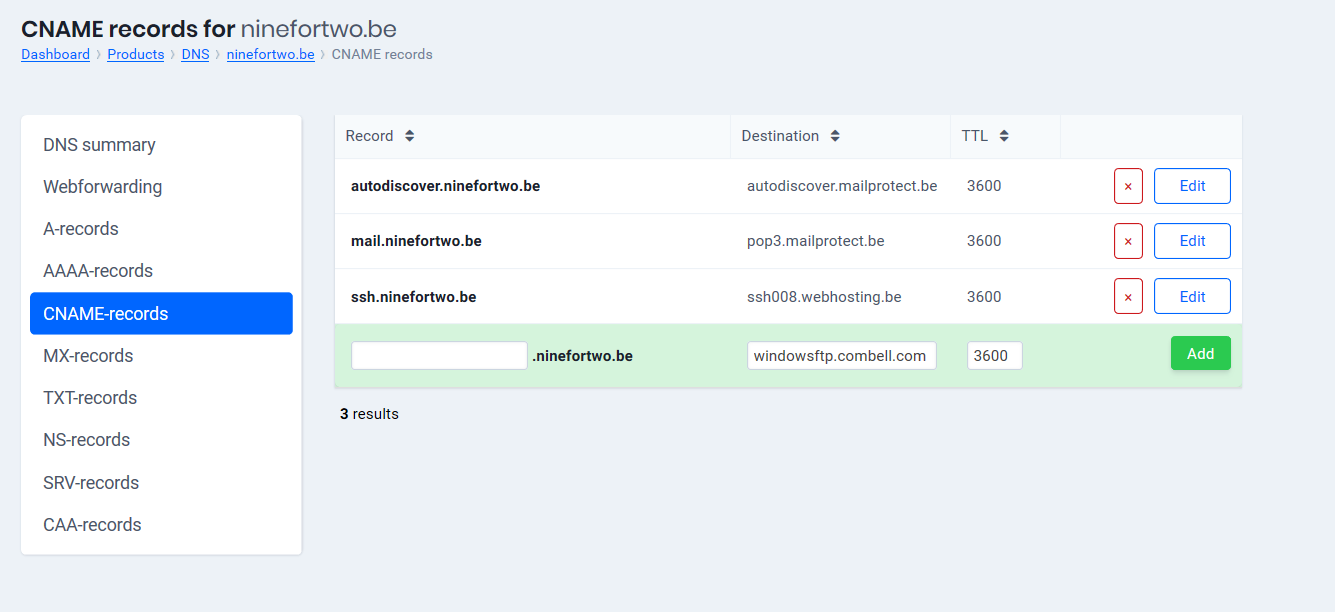
The hostname of the ftp server is then always windowsftp.combell.com instead of. ftp.yourdomainname.be.
If you still want to use ftp.yourdomainname.be in your ftp program, create a CNAME record for ftp.yourdomainname.be with the destination windowsftp.combell.com (see image) .

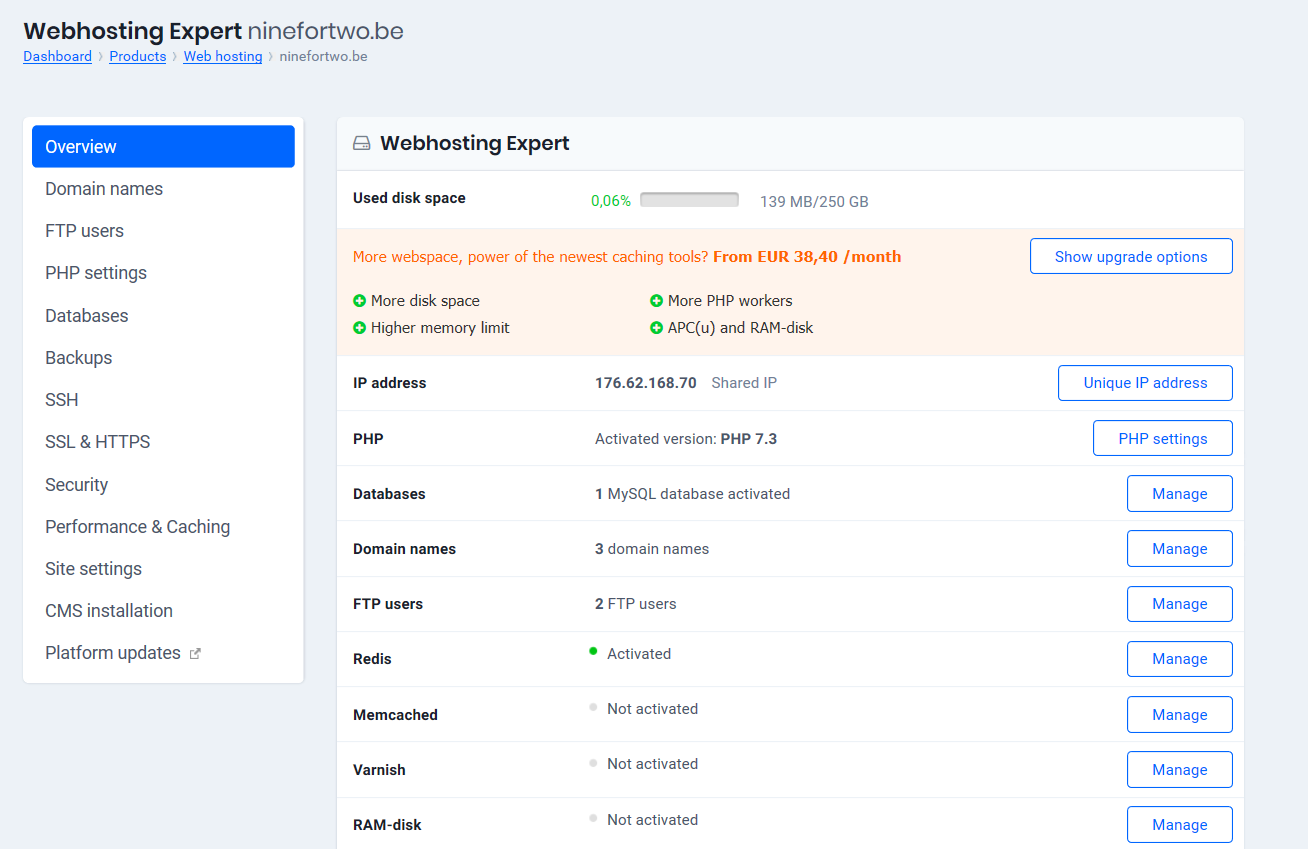
Do you have web hosting with Combell? Then you will find the IP address in the control panel. Go to My Products > My Web Hosting. Open the account with which you want to work by clicking on the “Hosting details”. The IP address is stated in the overview.
 2. Update your nameservers
To enable the changes to the DNS settings, you must update the nameservers to those of your new provider. This closes the transfer of your domain name.
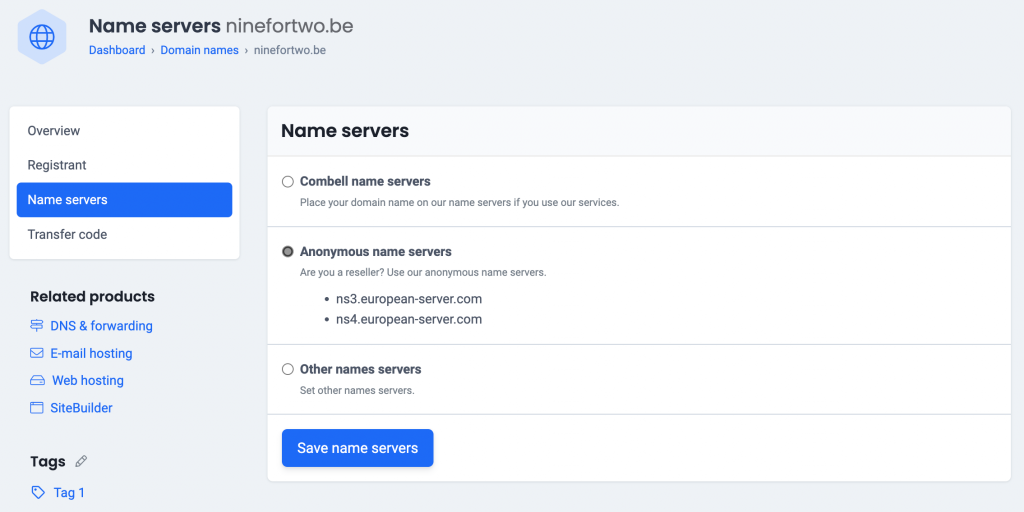
Have you switched to Combell? Follow these steps in the control panel
- Go to My products> Domain names> Your domain name> Name servers
- Choose “Combell name servers” and confirm (see image).
Read more about updating the name servers of your domain name
