In order to be able to create e-mail addresses with your own domain name, you must connect a domain name to Microsoft 365.
In order to add a domain name, please follow these steps in the Combell control panel.
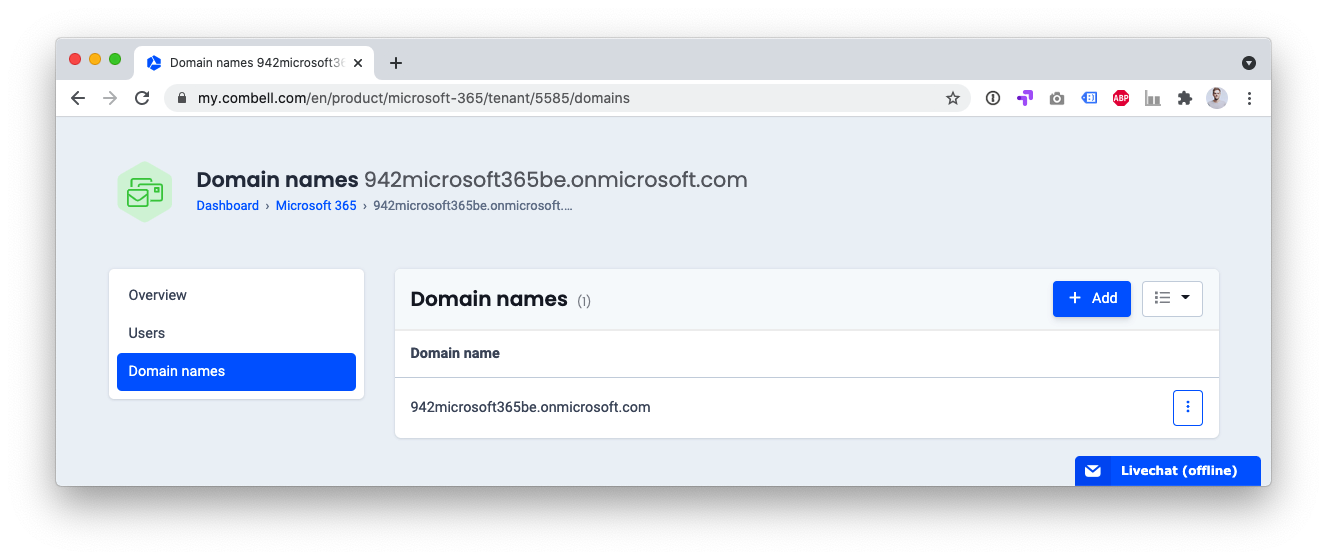
- Go to “My Products” > “Microsoft 365” (and choose the appropriate tenant if necessary)
- Click on “Domain names” in the menu on the left.
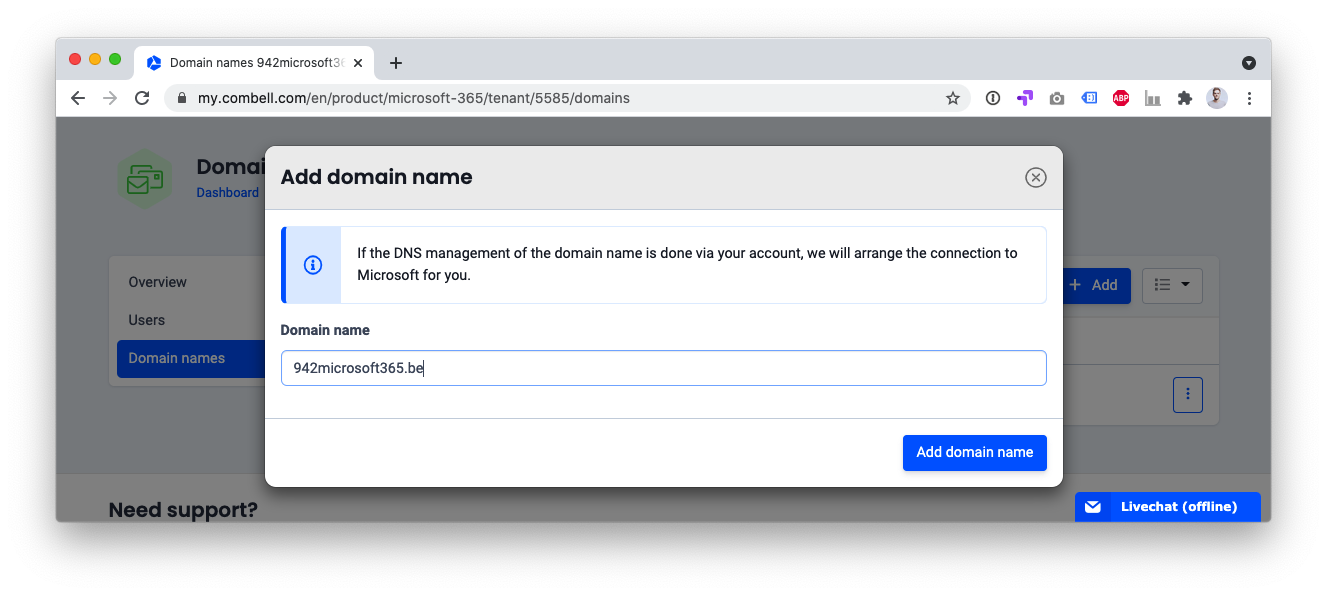
- In the list of domain names, click on the “+ Add” button.

- Enter your domain name (e.g. domainname.be) and click on “Add domain name”.

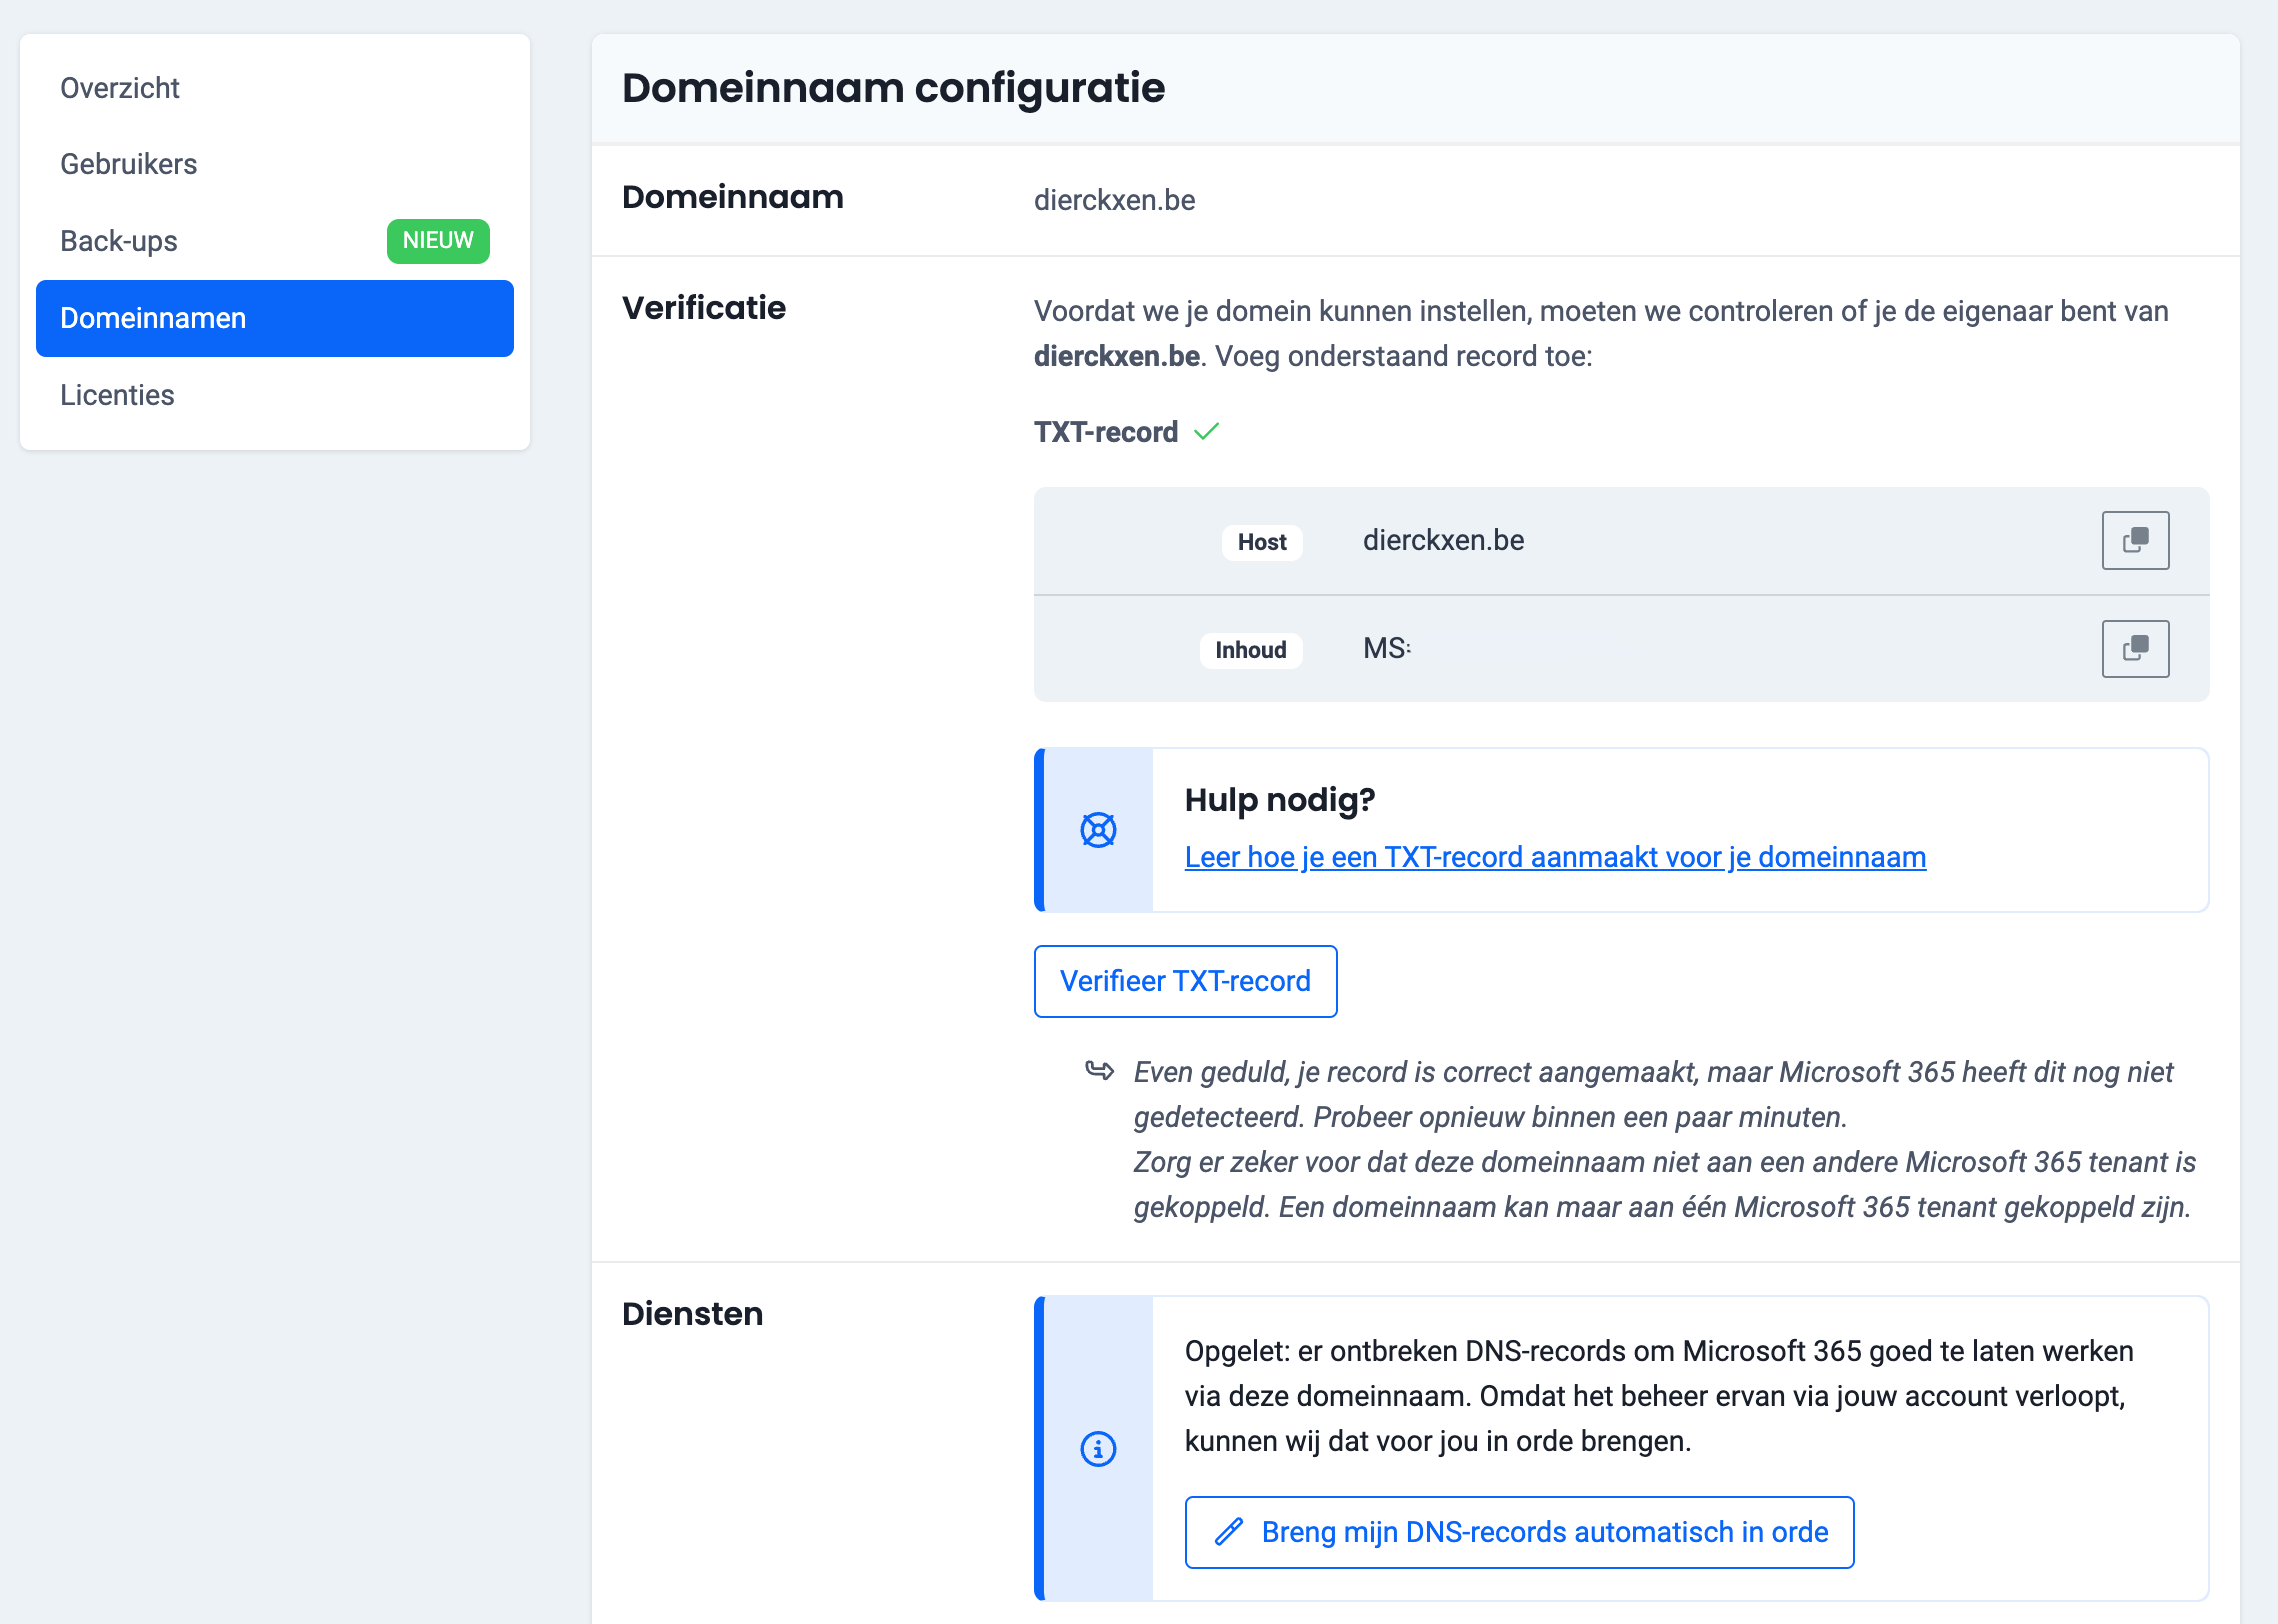
- After adding your domain name, you need to add a TXT record to your domain name’s DNS records. You do this on your domain name provider’s control panel.
Copy the TXT record and add the TXT record or click on “Set up my DNS records automatically” if your domain name is with us. We will then set everything up for you, see screenshot (in Dutch).
- Once the TXT record is added, you will be able to verify the DNS records here.
As soon as the DNS records have been properly configured, the domain name is fully connected to Microsoft 365. You can now create e-mail addresses with your own domain name.
Read further: How do I create users and e-mail addresses in Microsoft 365?