- Log in your control panel.
- Follow My Products >> My Web Hosting.
- Open the account you would like to work with, by clicking on Hosting details.
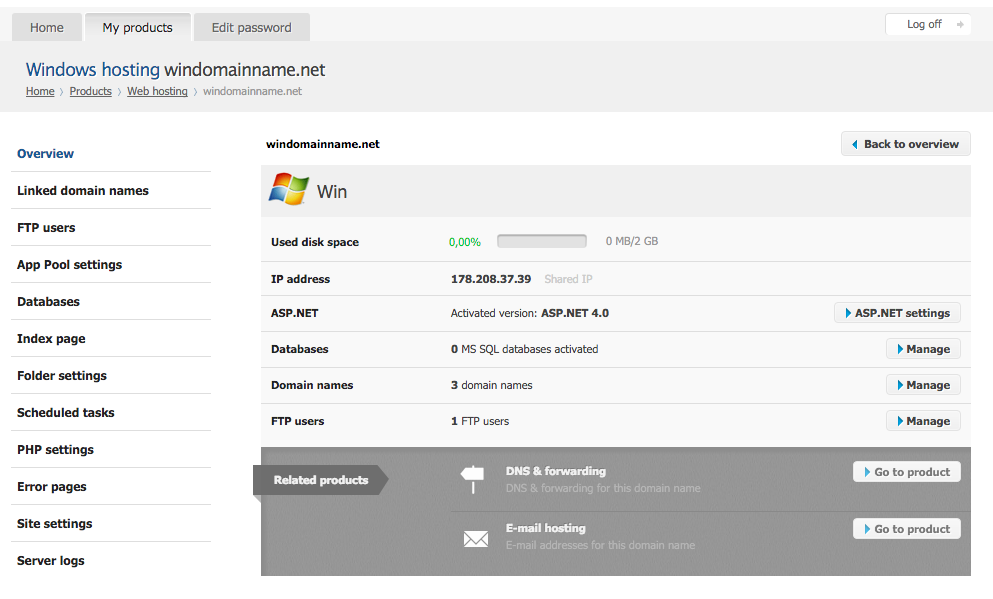
- Navigate to the panel to your left. Click on Folder settings.

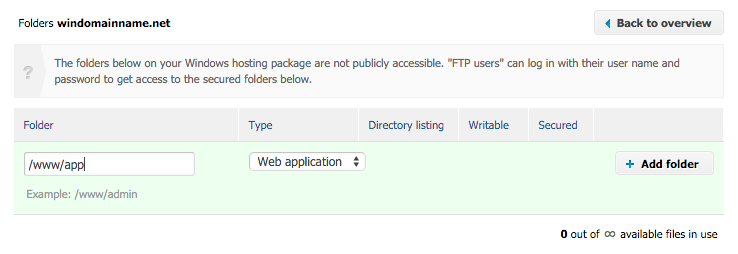
- Enter a path in the text field, select an option from the dropdown menu, then click on Add folder.
- Check the settings and click on Add folder.
- For Writeable Folder:
- Make sure the folder is already created (e.g. via FTP)
- Back in your control panel, enter the path for the folder (e.g. ‘/www/folder’) and click on +Add folder

- Click on the > Add folder button to make the directory writeable
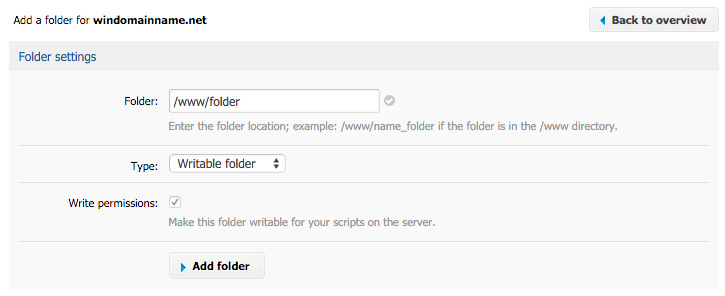
- For Virtual Directory:
- Make sure the folder is already created (e.g. via FTP)
- Enter the path for the folder (e.g. ‘/www/directory’) and click on +Add folder
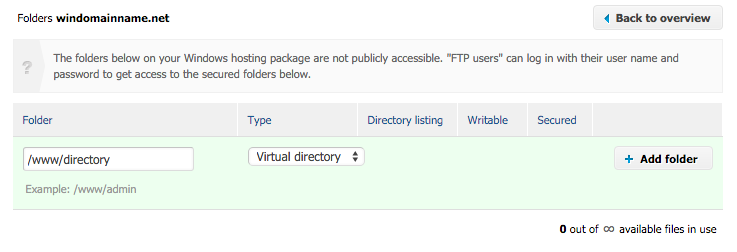
- Give your virtual directory a name. That name will be the visible name that will show the content of your /www/directory folder. (e.g. http://windomainname.net/Virtual/ will be an alias for http://windomainname.net/ directory/)
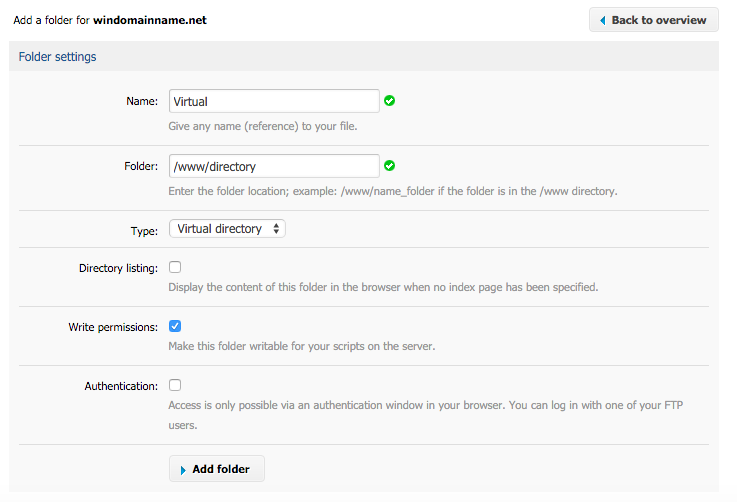
- Click on the > Add folder button to save
- For Web Application:
- Make sure the folder is already created (e.g. via FTP)
- Enter the path for the folder (e.g. ‘/www/app’) and click on +Add folder
- Give your web application a name and check the rest of your settings
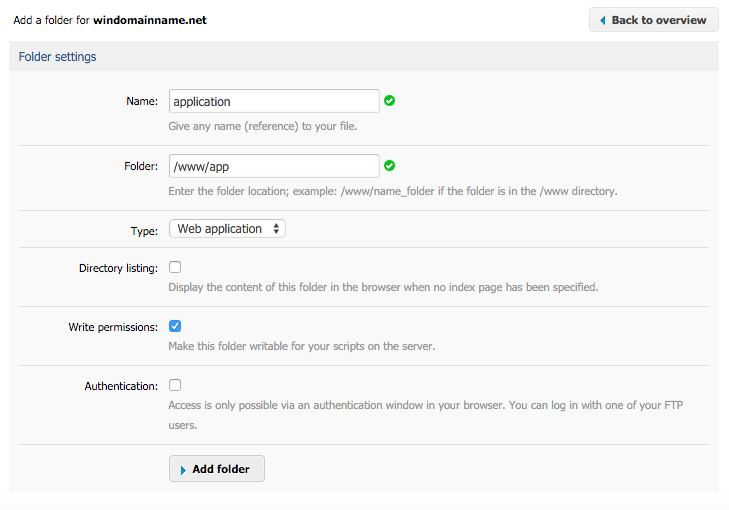
- Click on the > Add folder button to save
How to create a writable folder/ web application/ virtual directory?
Updated on 26 September 2022