Via your control panel, you can grant access to additional users and administrators.
If you want to give your customers more control over a product, you can create a user for them. Depending on what rights you grant to that user, your customer can manage mailboxes, DNS records or other services.
In addition to users, you can also add administrators. Administrators can be e.g. colleagues or employees. An administrator can perform financial and technical actions via your control panel, and can contact our helpdesk for assistance (unlike a user!).
Administrator
- Can contact our helpdesk
- Technical, financial, security and user management
- Uses the Combell control panel
- Maximum 3 administrators (more on request)
User
- Cannot contact our helpdesk
- Technical management only
- Uses the Combell control panel or a white-label control panel (the choice is yours)
- Unlimited number of users
Adding an administrator
Follow these steps in your control panel:
- Go to ‘Settings’ > ‘Users’
- Select ‘Administrators’ from the menu on the left
- Click on ‘+ Add’
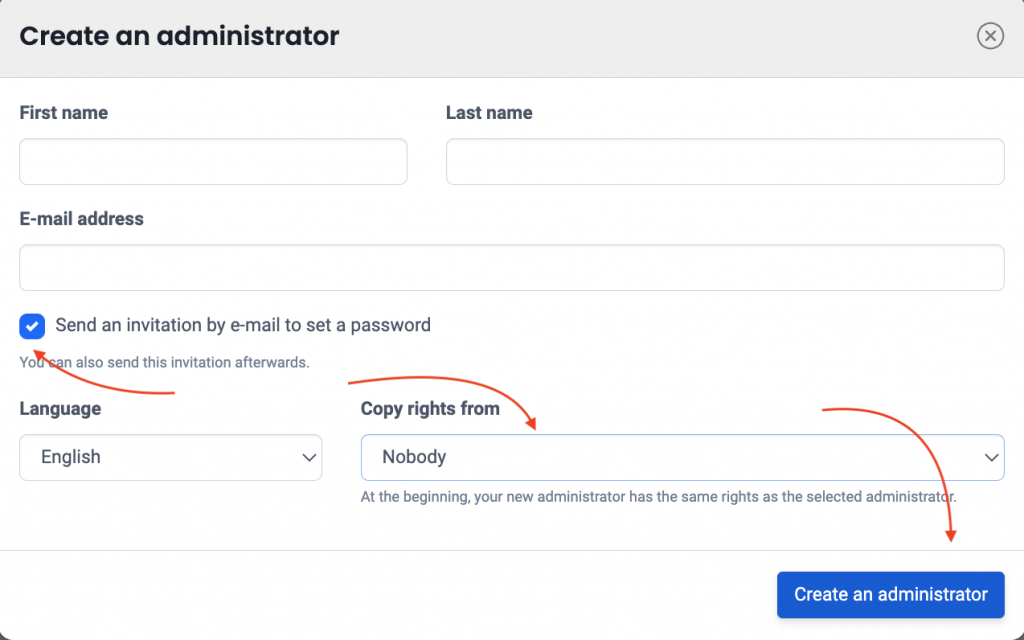
- Enter the details of your administrator and click on “Create an administrator”

Setting rights for your administrator
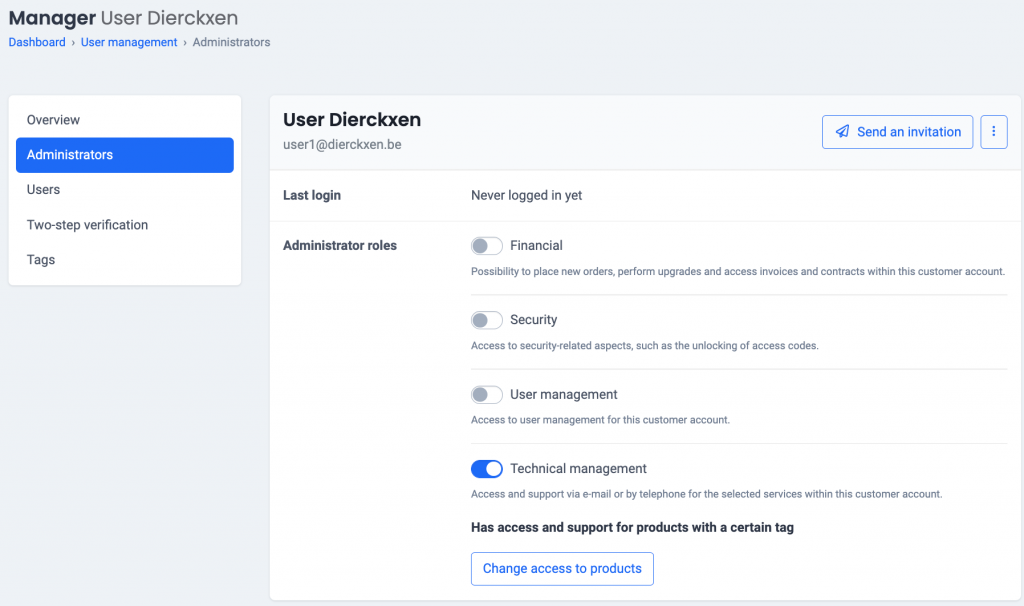
After creating your new administrator, you have to give him permissions. You can decide which tasks your new administrator is allowed to perform. Changes are automatically saved.
You have the option to turn on permissions for Financial, Security, User management and Technical management.

For technical management, you can further refine which products or accounts your new administrator can access. Click on “Change access to products”. Here you have 3 options:
- “Has access and support for all products.”
- “Has access and support for specific products or product groups.”
This will give you the option to decide which products (or product groups) this administrator can access and which ones not.
- “Has access and support for products with a certain tag.”
This will give you the option to let the administrator access all products that you’ve given a certain tag (for ex. the name of a client).
Adding a user
Follow these steps in your control panel:
- Go to ‘Settings’ > ‘Users’
- Select ‘Users’ from the menu on the left
- Click on ‘+ Add’
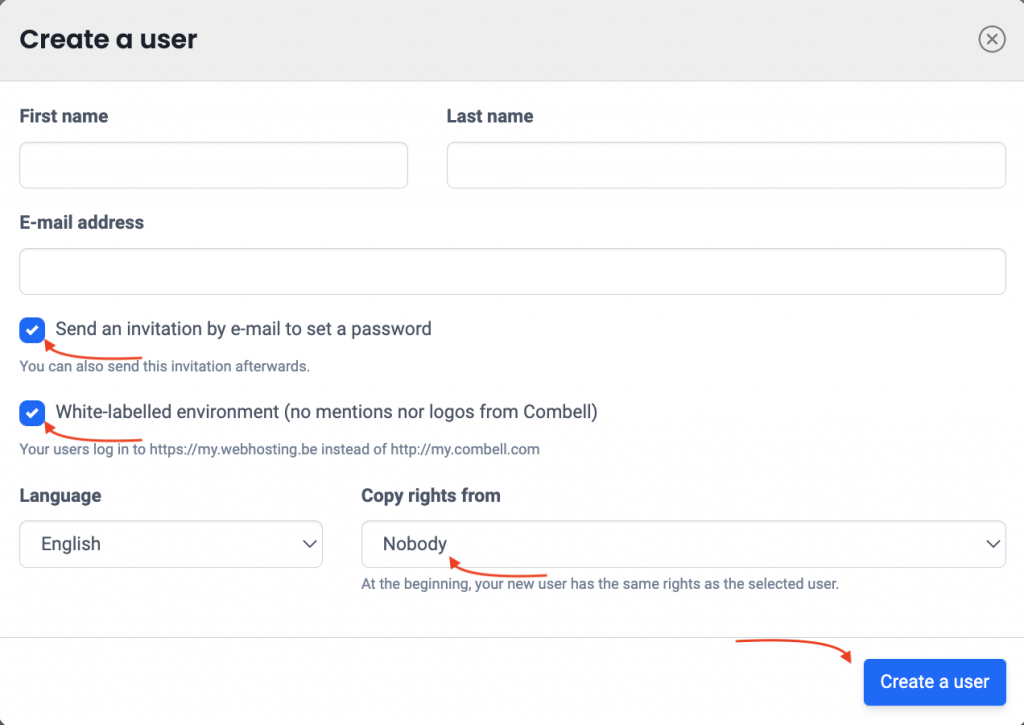
- Enter the details of your user and click on “Create a user”.

Setting rights for your user
After creating your new user, you have to decide if the user can acces all your products or only specific ones.
Click on “Change access to products” to make these changes.
Here you have 4 options:
- “Cannot access products”
- “Has access to all products“
Be careful, the user will have control over all the accounts within your reseller package if you select this option. - “Has access to specific products or product groups“
This will give you the option to decide which products (or product groups) this user can access and which ones not.
- “Has access to products with a certain tag“
This will give you the option to let the administrator access all products that you’ve given a certain tag (for ex. the name of a client).
